Main window
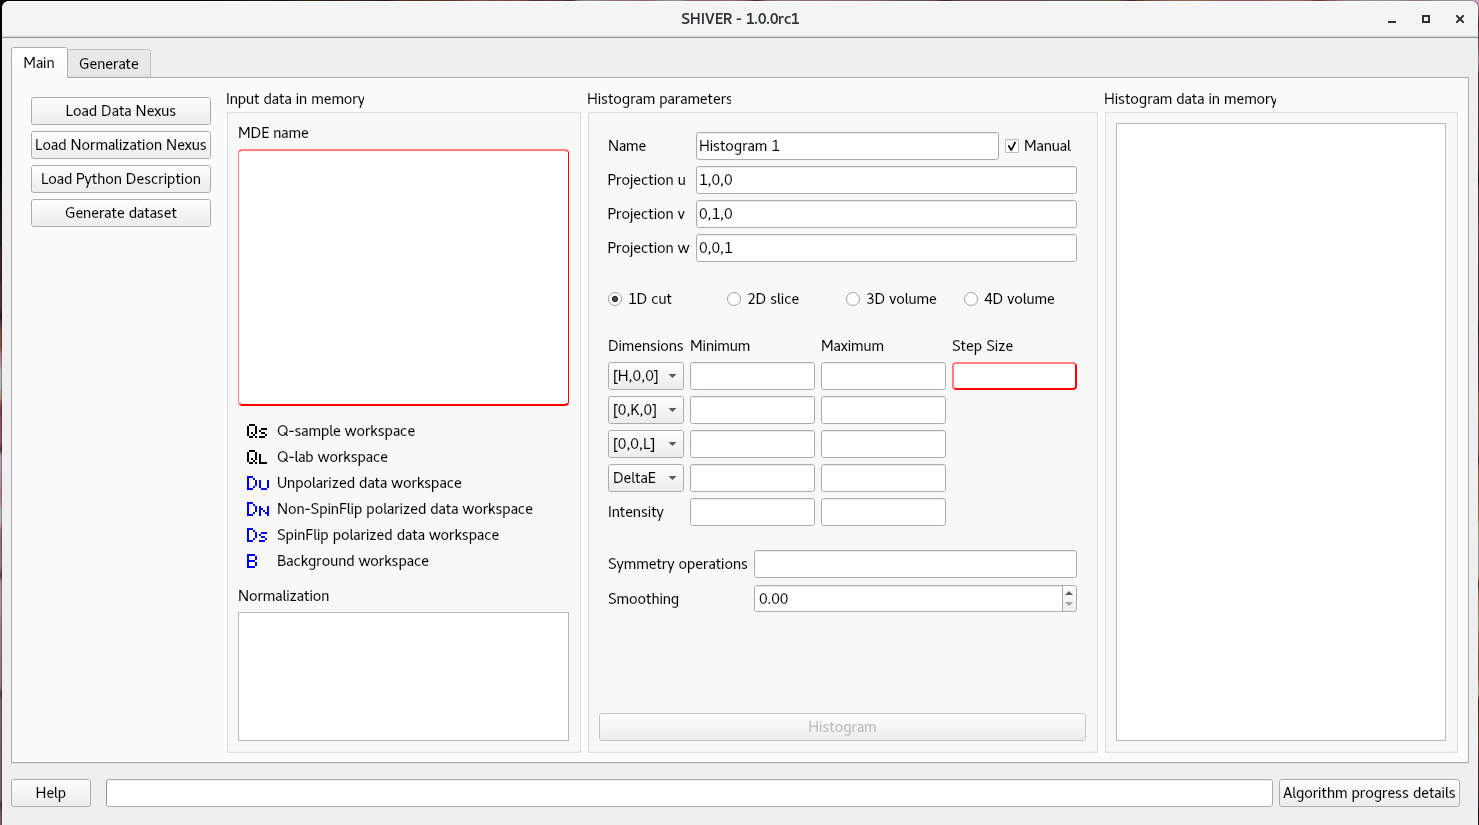
Loading data
Data and background multidimensional event workspaces can be loaded using Load Data Nexus button. Workspaces that contain goniometer angle dependent data will show up with a QS (Q-sample-frame in Mantid terminology) icon next to their name. These can be used as either data or background. Workspaces that contain only goniometer angle independent information will have a QL icon (Q-laboratory-frame).
To load a normalization workspace (incoherent Vanadium or TiZr scattering), click on Load Normalization Nexus. If the workspace is selected, it will be used for normalization. To unselect it, press the Ctrl key and click it with the mouse.
Alternatively, one can load dictionaries from previous uses of the scripting features. Click on Load Python Description, then navigate to a python script that contain the data definition. The program will try to look up the define_data_set function. If found, the user is presented with an option to load the workspaces related to one particular dictionary. On successfull load, data/ background/ normalization are automatically selected.
The Generate dataset button wil open the Generate tab, so one can create intermediate multi-dimensional
event datasets.
Selecting data
The Shiver software needs to have an MD event data selected. To achieve this, click
on the desired workspace name, then in the context menu Set as data, followed by the
dat type (unpolarized or polarized). If more than one dataset is available, selecting a
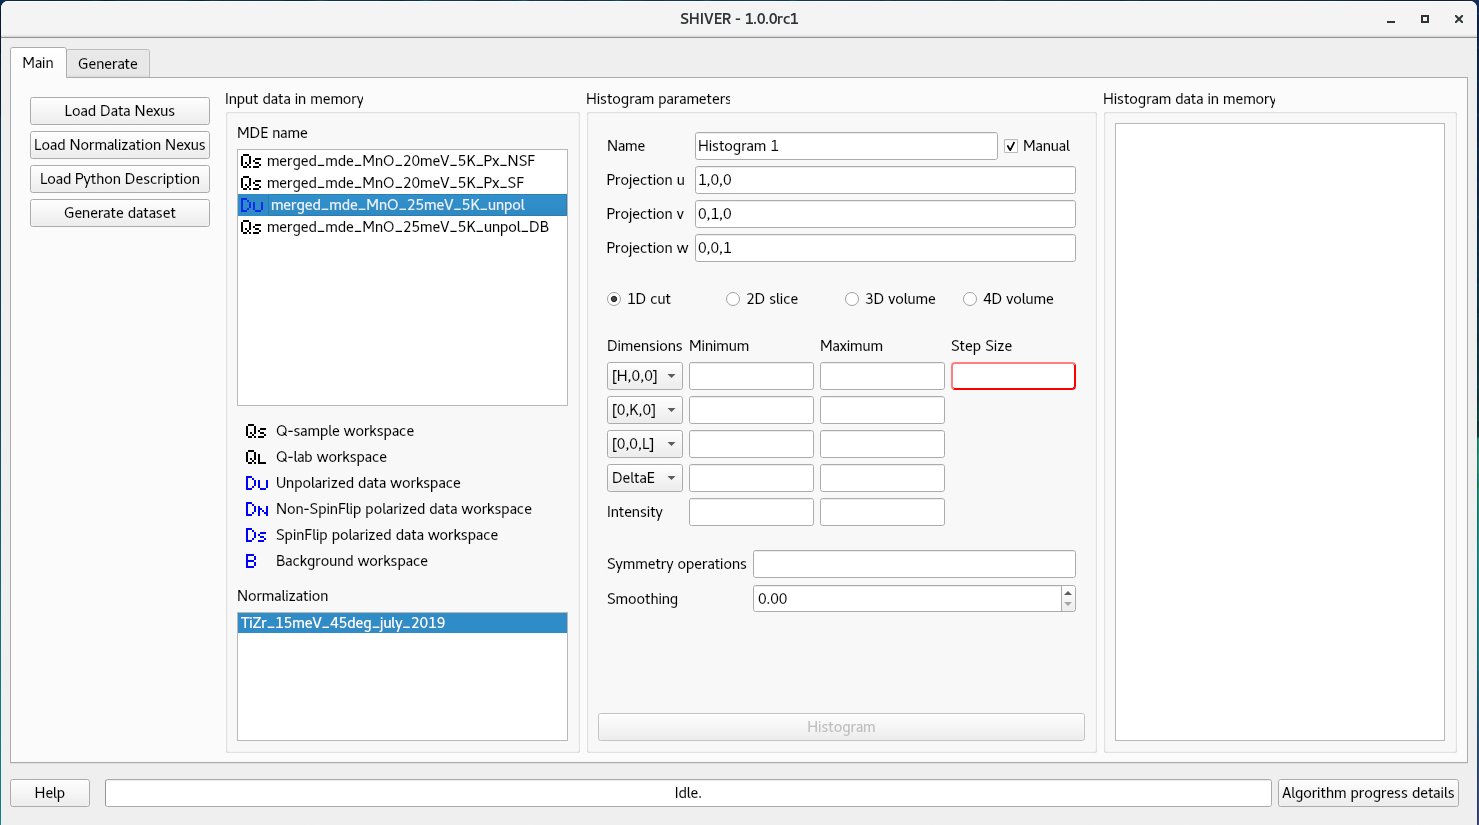
different one will automatically deselect the previous choice. The only exceptions are
when two workspaces are selected with different polarization states. On selecting/deselecting
a dataset, the icon next to the name will change. One cannot select as data a workspace
that is in the laboratory frame. In the absence of a valid selection, the Histogram
button will be disabled, and the border of the widget will turn red.
In addition, one can optionally select a workspace as background. Such a workspace will show
up with a label B in the list of datasets in memory.
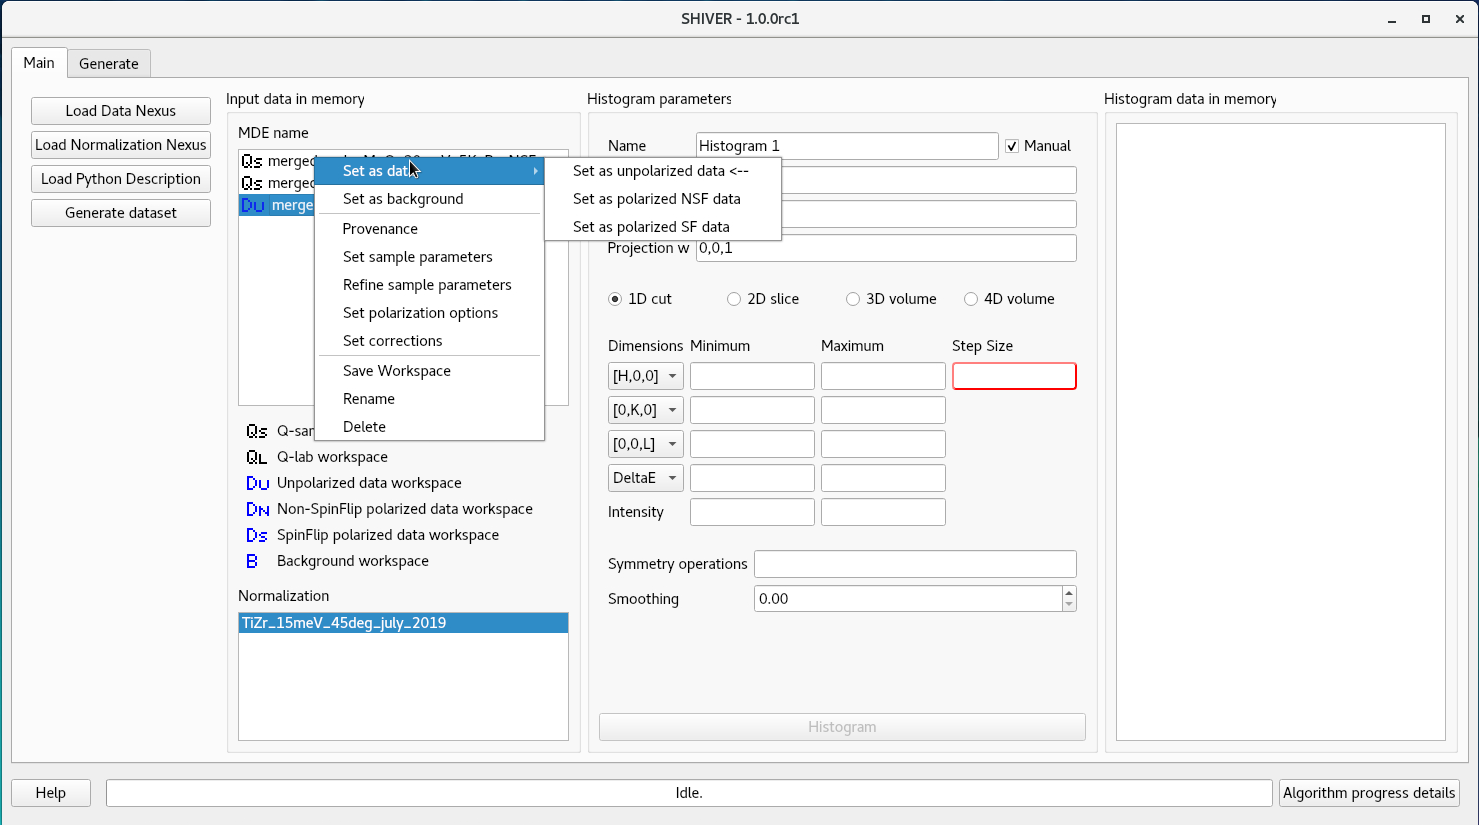
Additional options for MDEvents
One can use the mouse to click on an item. This will open a context menu. The user must
select one workspace to be the Data. Optionally, one can select a Background. See the
data selection section.
Selecting the Provenance item will open the Generate tab,
pre-filled with the parameters used to generate the workspace.
Set sample parameters will open a window to set/overwrite the sample lattice parameters and orientation (UB matrix)
Refine sample parameters will open a new tab, where the users can use select several Bragg peaks to refine the lattice parameters or orientation.
The Set polarization options allows modification of polarization parameters (such as flipping ratio or polarization state).
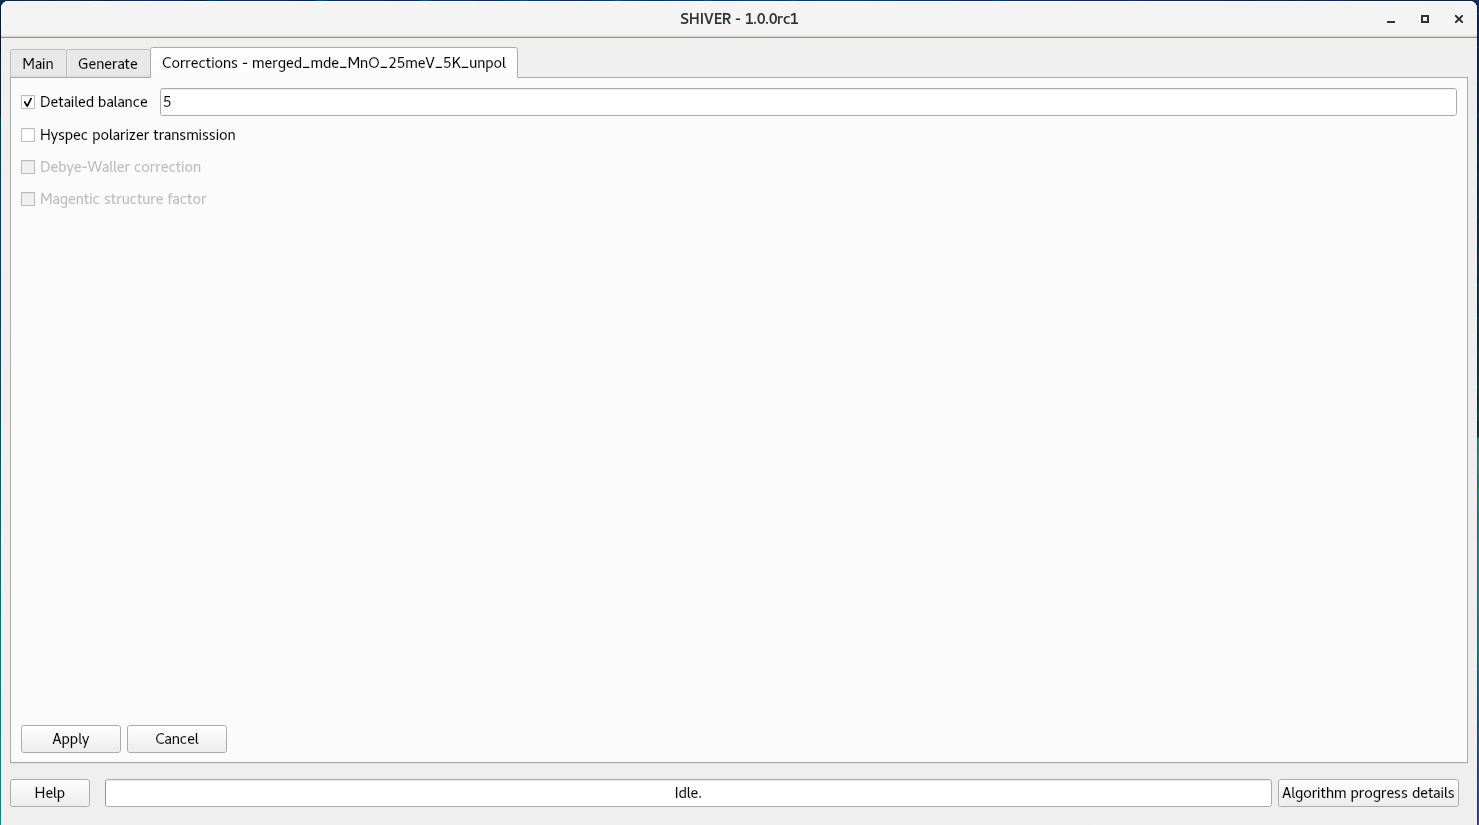
Using the Set corrections context menu item will open a new tab. Currently implemented features are corrections for detailed balance and for HYSPEC polarizer transmission. Applying these corrections will result in new MDEvent workspaces in the list. Their name appends _DB/_PT or both to the original workspace name.
Histogram parameters
When generating a histogram, one would like to have a unique name. By default, the user can select a name.
One can uncheck the Manual box, and Shiver will automatically change the name after each histogramming
request.
The viewing axes are set up using the Projection u, v, w inputs. Projections must not be colinear.
Changing projection parameters will change the dimenion names.
For example, selecting one of the projections as 1,1,0 yields
a dimension name of [H,H,0]. The default projections, 1,0,0, 0,1,0, 0,0,1 correspond to [H,0,0],
[0,K,0], and [0,0,L] viewing axes.
Selecting numbers of non-integrated dimensions can be done using the radio buttons. For each of the non-integrated dimensions a step must be provided. All dimensions allow setting of minimum/maximum values (these must be doen in pairs). For convenience purposes, one can specify the minimum and maximum values for intensity (not necessarily both).
The symmetry operations are the same as those accepted by the
MDNorm algorithm.
The Smoothing option allow for a Gaussian smoothing. A non-zero number is the width in histogram pixels.
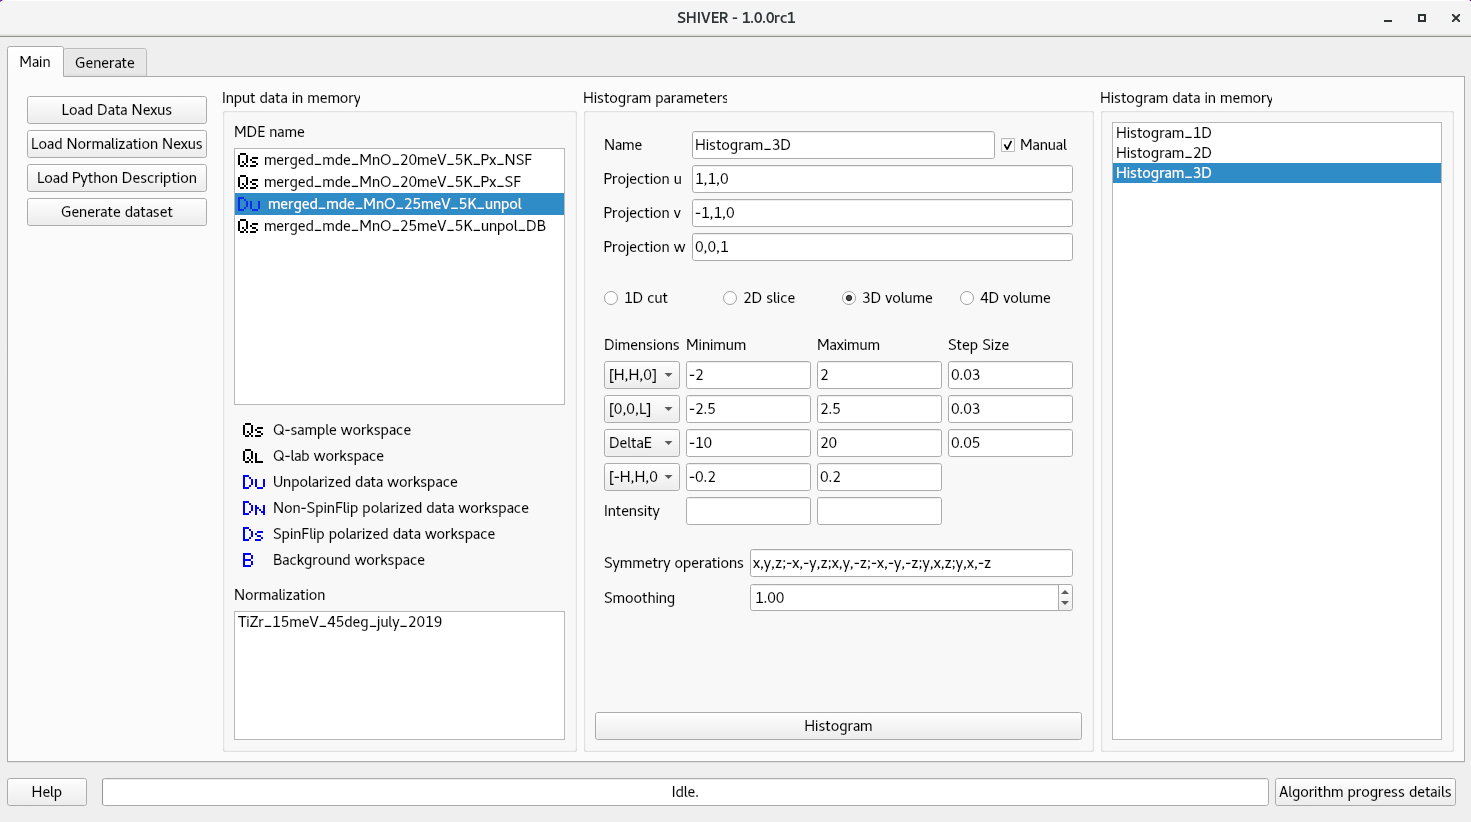
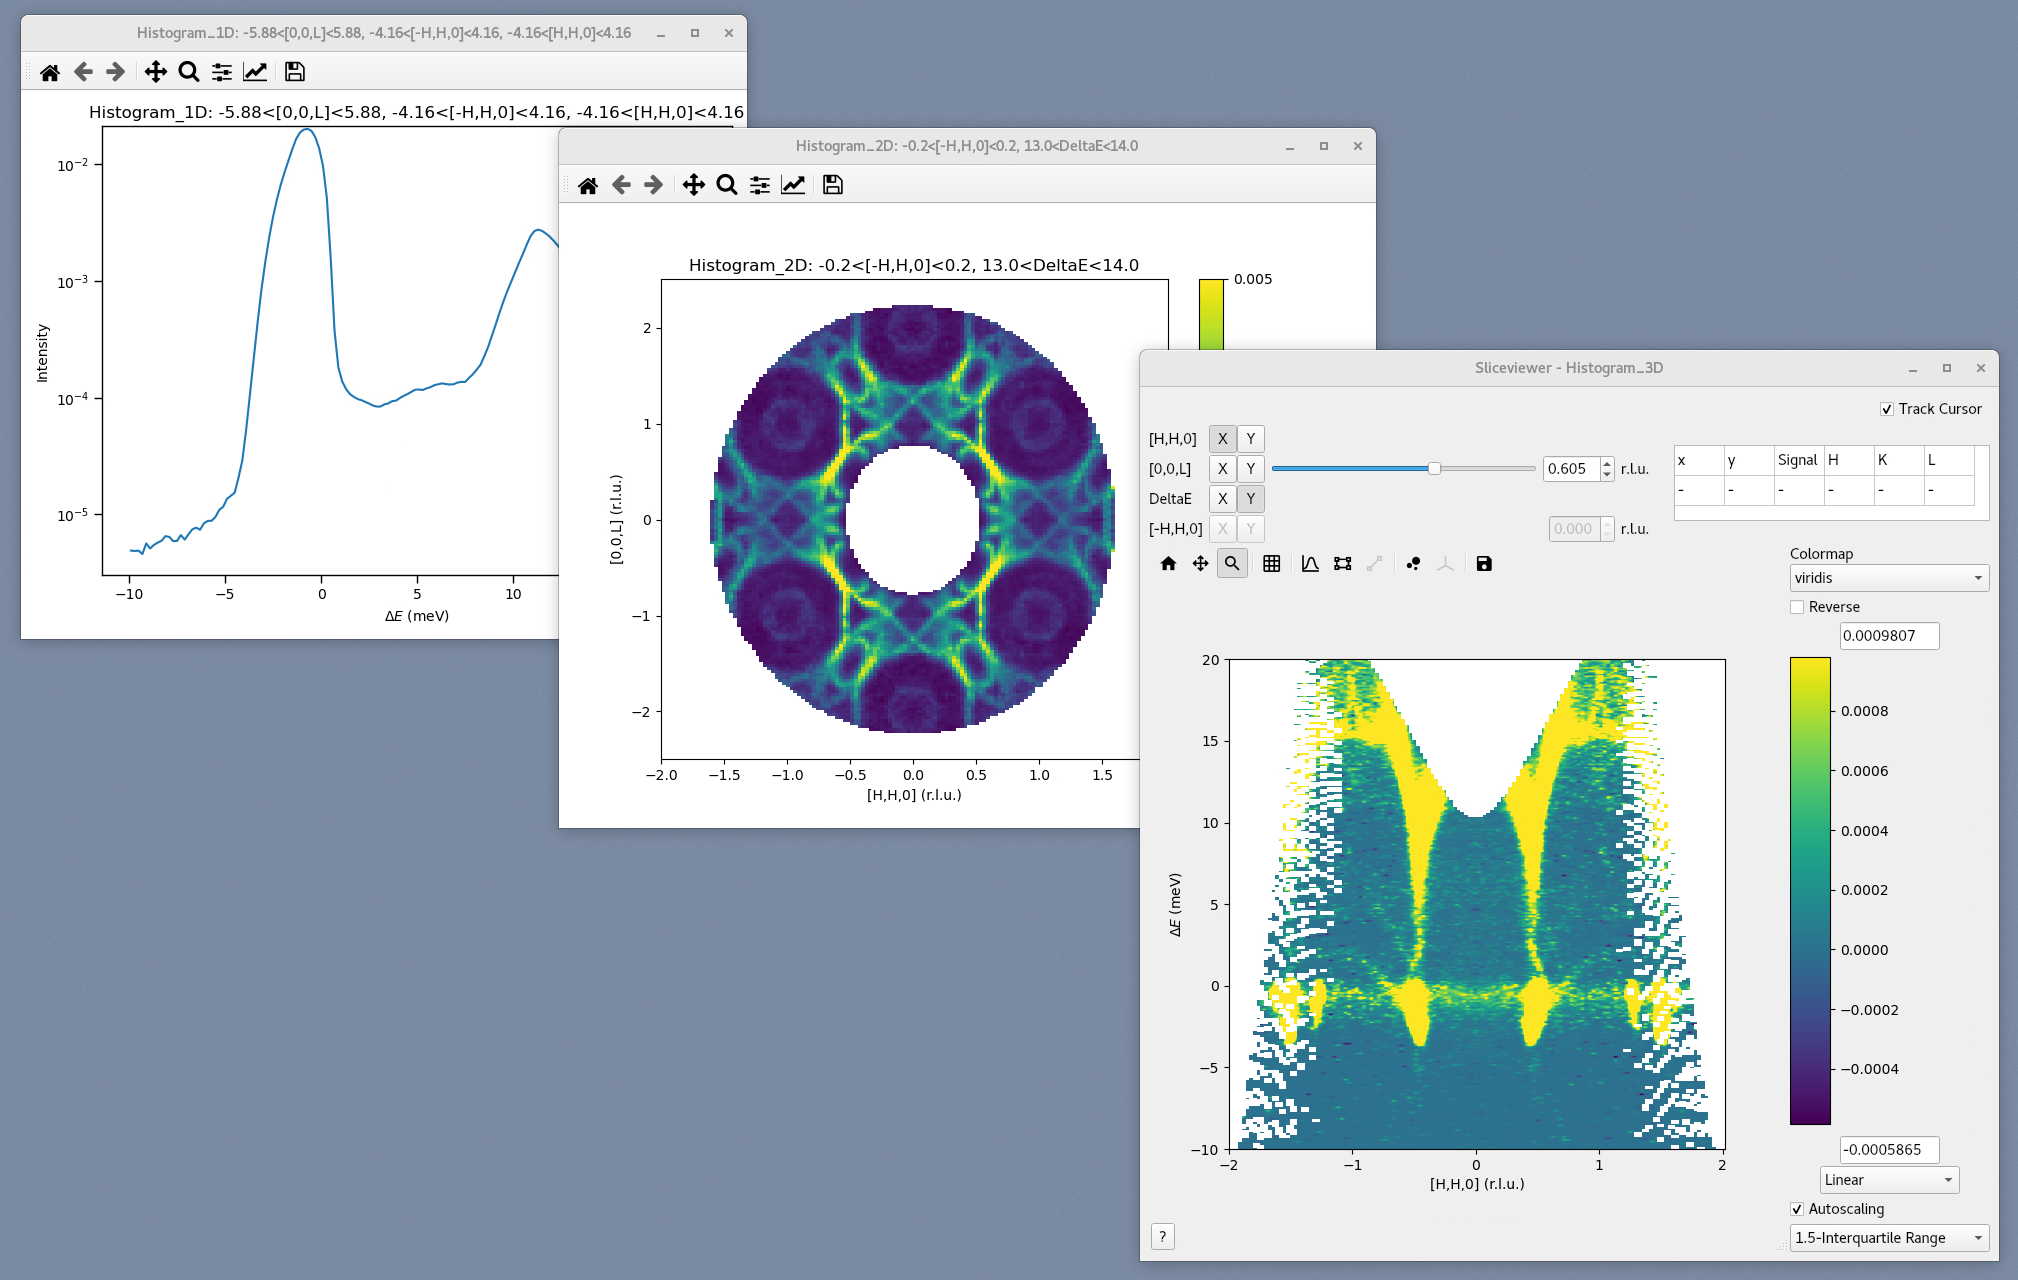
Click on Histogram button to produce the MDHistogram workspace. The corresponding image of the
histogram will show up:
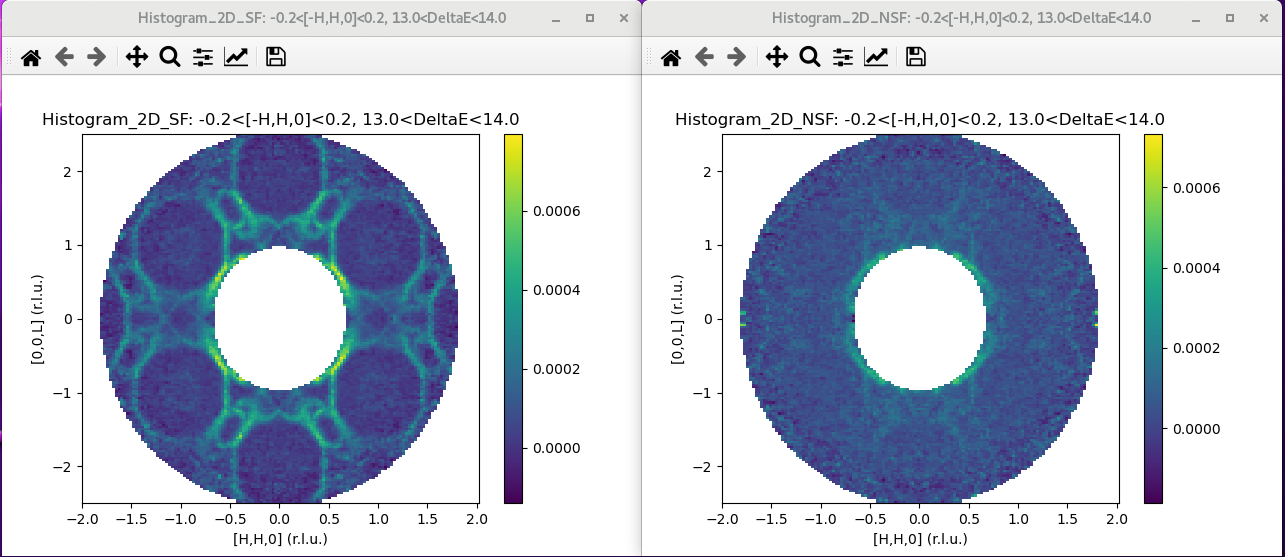
Note that in the case two workspaces are selected as polarized spin flip and non spin flip data, the result of histogramming will be a set of flipping ratio corrected histograms:
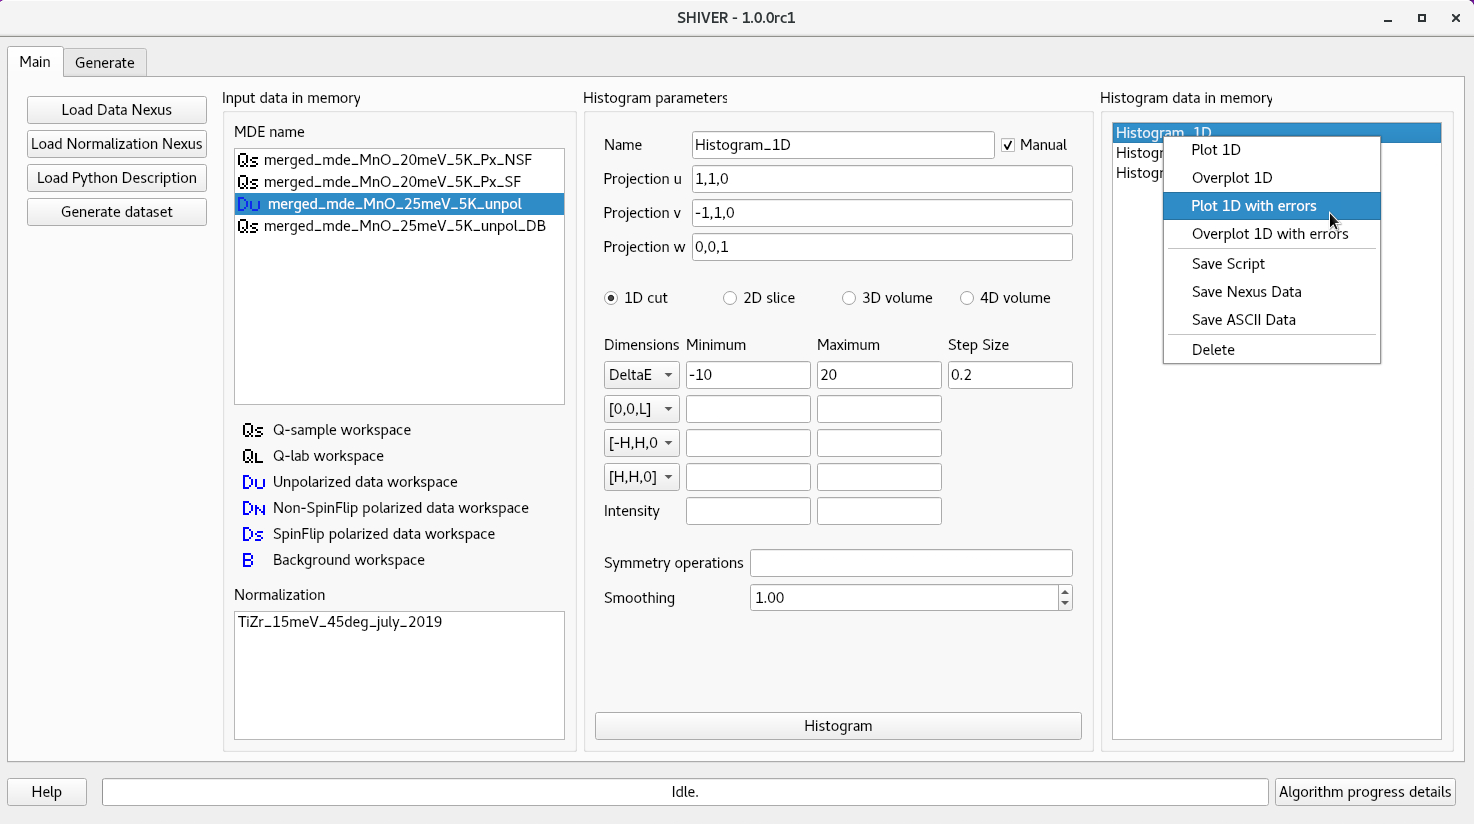
Histogram plotting/output options
Once the histogram workspace is produced, it will show up in the list on the right hand side. If selected, a histogram will try to populate the GUI with the parameters used to generate it. Right clicking on the workspace opens a context menu, to allow plotting or saving the data.
Configuration options
One can edit the configuration file in ~/.shiver/configuration.ini.
The relevant parameters for the plotting are display_title and logarithmic_intensity.